Photo : Photo by Aubrey Odom on Unsplash
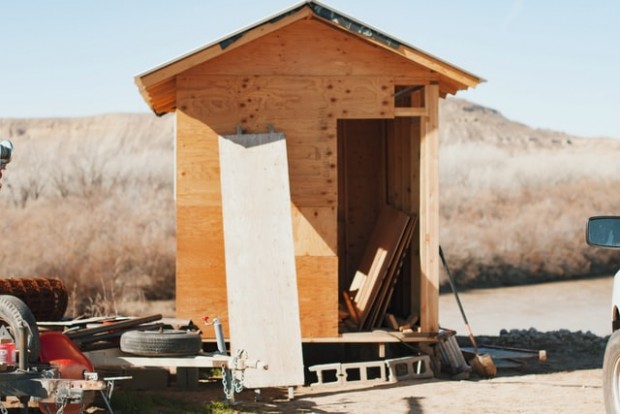
A lean-to shed provides a compact storage solution for packing away your gear securely. It can be built quickly and within a small budget. As this shed has a single sloped roof, it can easily be crafted with one wall attached to an existing structure like a house or fence.
Get some quality lean to shed plans before you begin construction. Here are the basic steps involved in the building of a slanted roof shed.
Build The Floor Frame
A shed's floor frame is built using rim joists that form the outer frame and cross-beams, known as floor joists that brace the outer wall frame.
Create the rim joists using two six-foot-long beams of 2x4 lumber. Cut the lumber to the required lengths using a circular saw. Lay out the rim joists on the floor parallel to each other.
Craft six floor joists of 45-inch length each and place them at intervals of 16 inches between the two rim joists. Secure them with 16d galvanized nails.
Skids support the floor joist and provide a sturdy base for the shed to sit. You can place the skids on flattened gravel pads or on concrete blocks.
Build two six feet long 4x4 skids and place them on the ground. Align the skids flush with the frame and toenail the skids with the floor joists. Fasten plywood sheathing over the floor frame with nails.
Craft Wall Frames
Construct the wall frames on the floor and hoist them later. To build the rear wall, create two 6 feet long top and bottom wall plates and two eight-foot-long side posts. Four wall studs are mitered and fastened between the side posts at intervals of 18 inches.
The front wall would have a four-foot-wide door, so there will be two one-foot-long bottom plates and one 6 feet long top plate. The wall studs would be 81 inches long, and the jack studs would be 73 inches in length.
Install the double header first and then secure the cripple studs to complete the wall frame. Use two layers of 2x6 lumber to reinforce the door frame. This will also provide a surface for attaching the strap hinges.
Hoist the rear and front walls into place on the floor frame and secure them with bracing. Construct the side walls similar to the rear wall and brace them into place. Position the edges of the wall frames in line with the edges of the floor frame. Verify that all four walls are square and fasten them with screws to each other.
Drive screws at 8-inch intervals into the bottom plate of each wall frame to secure them with the floor frame. Double-check that all corners are square and all walls are level.
Measure and cut CDX plywood siding according to the dimensions of each wall. Secure the siding to the wall frame using 2-inch nails driven at one-foot intervals.
Assemble The Slanted Roof Frame
The sloped roof of a lean-to shed allows snow and water to drain away without seeping into the wood.
Craft five 51-inch-long rafters using 2x4 lumber beams such that they can be fastened with the top plates of the front and back walls. First, create one template rafter and use it to copy and create the other rafters. Install a collar tie underneath each rafter to brace it securely.
Secure a gable stud underneath the rafters over the end walls. Fasten weather-resistant siding flush with the rim joists of the wall frames by nailing at 8-inch intervals. Create support beams by cutting 2x4 lumber with a circular saw and then attach them along both sides of the roof at 20-inch intervals. These beams will reinforce the roof and transfer its weight to the side walls.
Install siding on the rafter by staggering the joints with 6d galvanized nails. Protect the open areas of roof sheathing by fastening rake trim over them. Attach a drip edge and cover the entire roof with felt and asphalt shingles.
Use plywood siding to craft the doors and fasten them in the door frame with strap hinges.
Final Touches
Use a caulk gun to seal all openings left between the lumber or siding sections. Sand any rough edges or bumps in the wood on the sheathing and create an even surface area. First, apply a coat of primer over your shed and let it dry for a day.
Then apply 2 to 3 coats of stain on paint on your shed. Use a paint roller to apply even and thick coats of paint along the same direction as the wood grain. Even out any drips along edges before the paint dries. For areas such as the top of beams, where the end grain is exposed, run the brush slowly several times to allow the paint to soak into the wood.
Let one coat of paint dry for a day before applying the next coat.
* This is a contributed article and this content does not necessarily represent the views of universityherald.com